
Carlton's Copy Shop
Sales Order
Case Study Using Excel 2010
By J. Carlton Collins
As an accounting software installer, I’ve learned from experience that most businesses can pick blindly from among the top accounting systems in the world and pretty much get the job done. From one business to the next, accounts payable needs, payroll needs, trial balance needs, reporting needs, and even inventory needs are similar and well covered by today’s top accounting systems. However, there is one area which differs dramatically - and that area is in the sales order. It turns out that each company sells differing kinds of products and services with options so varied, that few accounting systems are prepared to handle those needs. In this situation, I make a bold claim that an Excel template can be easily used to fill in the missing gaps and supplement any accounting software system to provide excellent order taking capabilities.
In this case study, let us assume that we are working with a small copy shop – a small family owned company with about $300,000 in revenue. In this case they have determined that QuickBooks meets all of there needs, except for order taking. Therefore our goal will be to build a Sales Order system using Excel in only a few minutes. Listed below are the key elements that you will learn in this case study:
1. Neat and Organized Worksheet Design
2. =NOW()
3. Data Validation Lists
4. =VLOOKUP
5. Creating Macro Buttons
6. Creating Macros
7. Relative versus Absolute Macros
8. Worksheet Protection
Think about a copy shop for a minute, what is so difficult about taking an order in a copy shop? It is the options. How many copies would you like? Do you want that printed on front and back? Stapled or Bound? What kind of binding? What size paper? What color paper? What pound paper? Do you want regular or fast delivery? These are all standard questions asked by a copy shop, yet QuickBooks, nor any high end accounting system is able to take such an order. Even the million dollar solutions aren’t equipped to take such an order. These companies must instead resort to purchasing a software application called a “product configurator”, solutions which can costs $75,000 to $750,000 or more. To make matters more difficult, there are often rules associated with various options – for example, when ordering a car, if you order the sun roof option, you can not also order the T-Top option. Product configurators must account for and accommodate these types of situations.
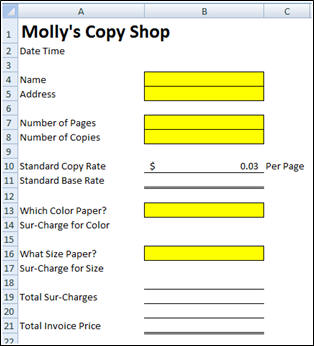
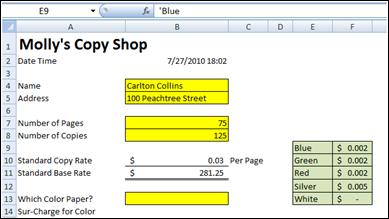
1. Let us begin by simply labeling our sales order form. As you can see in the screen to the right, we’ve added some labels and highlighted some data input fields with yellow background and gridline borders. (For purposes of this case study, we will only build in options for color and size, but once you get the hang of it, adding in additional options for paper weight, binding, duplex printing, etc is a rather simple matter.)
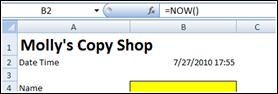
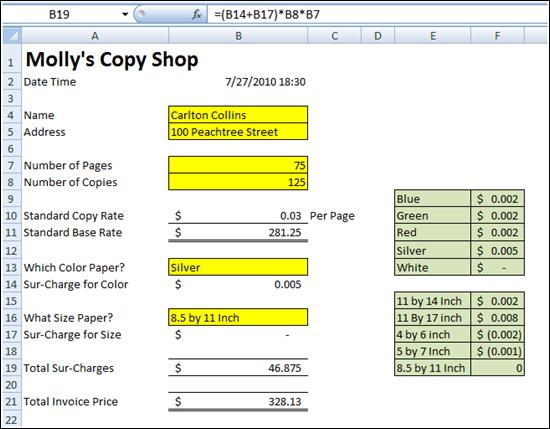
2. =NOW() – Next we type in the Excel Function =NOW(). This will cause Excel to display the computer’s date and time each time an order is produced. You can see the =NOW() function in the formula bar and the results displayed in cell B2 below.
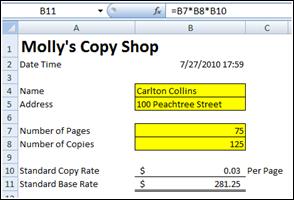
3. Calculations for Base Rate – Next we add simple calculations to multiply the total number of pages to be copied by the total number of copies and the base rate per copy. To make it easier to visualize, I have added some customer data. (The formula contained in cell B11 is displayed in the formula bar.)
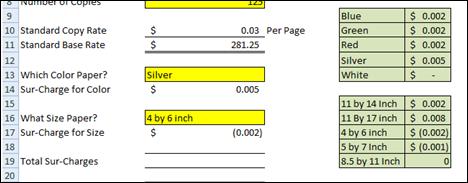
4. Color Options – Next I created a table of the color options along with a sur-charge rate per page for each color. Notice that there is a “zero” sur-charge when selecting white paper. Make sure to sort your table in descending order because we plan to refer to that table via a Lookup function – and as we all know, lookup functions do not work properly unless the table array is sorted in descending order. To make the table of options more readable, I applied gridlines and a greenish background.
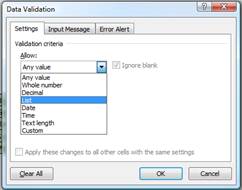
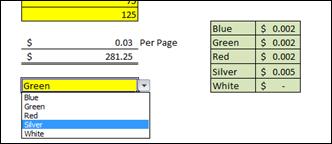
5. Data List Validation – Now this is where the excitement begins. Next I create a data validation list in cell B13 using column one of my options table. To do this, select B13, and choose Data validation from the Data Ribbon. Next select List and use the Cell Chooser to highlight the options in column one of your color options table.
6. =VLOOKUP – Next I inserted a =VLOOKUP function in cell B14 to return the Sur-Charge rate based on the Color Selected.
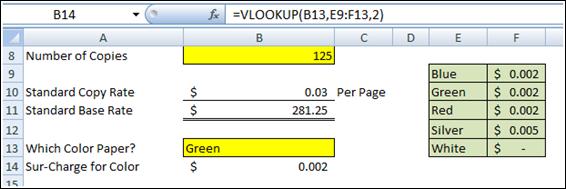
Notice that when you select different colors in cell B13, the rate in Cell B14 changes according to the Color Option table.
7. Size Options - Repeat steps 4,5 & 6 above to also create Size Options.
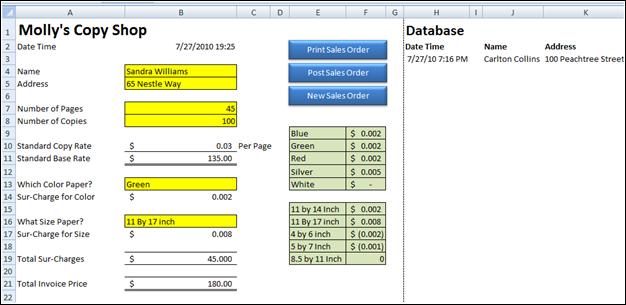
8. Invoice Total – From here it is an easy step to add calculations to total the invoice. Of course your complete invoice would also include sales tax caculations as well. Our example is kept as simple as possible to make sure that the key points come across as easy as possible. Here’s what we have so far:
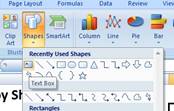
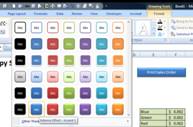
9. Macro Buttons – To make the Sales Order form easier to use, next we will add three macro buttons. We start this process by creating a single text box, and using the Drawing Tools to make it look fancy. Here are steps:
![]()


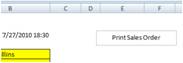
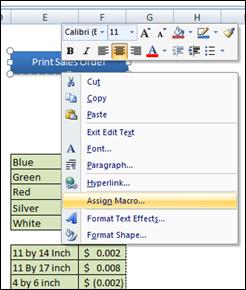
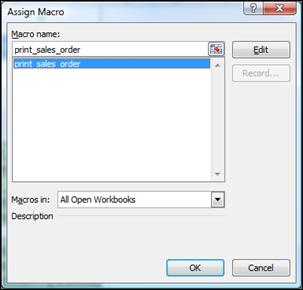
10. Create the Print Macro – Next create a print macro by selecting “Macro, Record Macro” from the “View Ribbon” (make sure that no spaces are used in your macro name and save the macro to “This Workbook). Set the “Print Area” appropriately to display your Sales Order Form. Next simply highlight your Sales Order Form and print three copies, then stop recording your macro by selecting “Macro, Stop Recording” from the “View Ribbon”. Once completed assign the Macro to the Print Sales Order Button by right mouse clicking and selecting “Assign Macro”. The right click menu as well as the Assign macro Dialog box are shown in the two screens below.
You want to print three copies of the Sales Order as follows: One for your customer’s records; One for your product people to follow when making the copies, and one for bookkeeper to use when entering the invoice amount into QuickBooks.
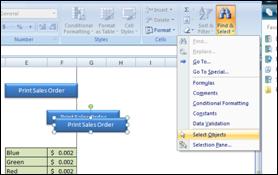
11. Additional Macro Buttons – Next right click on the edge of the existing macro button twice, and choose “Copy”; then click away from the button and Paste twice. This will create two exact copies of your macro button. (You must right click twice on the edge of the button to display the second menu of options.)
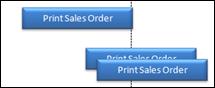
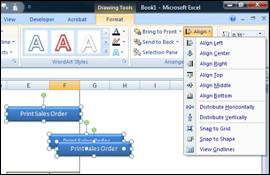
Next select the “Select Objects” menu option from the “Home” Ribbon’s “Find and Select” menu in the “Edit” Group. Then lasso the three buttons and from the “Drawing Tools”, use the Alignment tools to left justify and Distribute Vertically the three buttons.
The results will appear as follows:
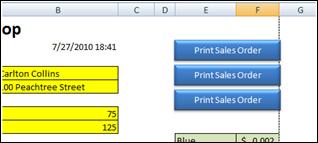
Press escape to deselect the “Object Pointer” tool, and return your cursor to normal.
12. Post Sales Order Macro Button – Next I created a macro to post the sales order information to a database. This is complicated and I will demonstrate several teaching points in class to help you fully understand the process of writing a combination relative and absolute Here are the steps:
a. Relabel the second Macro Button to Read “Post Sales Order”. This will require you to first right mouse click on the button and select the text, or if you prefer, remove the macro before continuing.
b. Highlight cells B2 thru B21 and label that range “salesorderdata” using the Name Box.
c. Go to Cell H1 and enter the phrase “Database” in cell H1.
d. Label cell H1 “database” using the Name Box.
e. Copy the labels in cells A2 thru A21 and Paste Transpose them to cell H2.
f. Start recording a macro named “postsalesorder”.
g. Click the “Use Relative References” option from the Macros Group on the View Ribbon.
h. Press the F5 key to launch the GoTo Dialog Box.
i. Select the range “salesorderdata” by double clicking on the word “salesorderdata”.
j. With your cursor hovering above the selected range, right mouse click and choose “Copy”.
k. Press the F5 key to launch the GoTo Dialog Box.
l. Select the range “database” by double clicking on the word “database”.
m. Press the End key, followed by the Down Arrow. (You will now be on the last row.)
n. Press the Down Arrow. (You will now be on a blank row underneath the last row.)
o. With your cursor hovering above the selected range, right mouse click and choose “Paste Special”.
p. In the paste Special Dialog Box, check Values and Check Transpose, and click OK.
q. Place your cursor on cell A1.
r. Stop recording the macro by selecting “Macro, Stop Recording” from the “View Ribbon.
s. Assign the newly recorded macro to the Post Sales order macro Button.
t. Select Column H and format it to display Time and Date.
u. Adjust the width of your database columns to your preference.
13. New Sales Order Macro Button – Finally, edit the Third macro Button to Read “New sales Order” and create a macro that selects the yellow background data cells and deletes the contents. (Make sure to toggle the “Use Relative References” option off because this macro needs to be an absolute macro.) (Also make sure to select Cell B4, then hold the CTRL key down while you also select the other yellow back ground cells). Before you Stop Recording this macro, click on cell B4 so your cursor will be in the correct place to start recording a new sales order.
14. Testing – Test your three macros by filling in new sales order information, then click the three macro buttons in sequence to print, post and delete your data.
15. Unlock Data Input Cells – Next, select the cells containing the yellow background and also select the database columns (Hold the CTRL key down to make multiple selections. Then format the those cells to unlock them by right mouse clicking atop your selection and selecting “Format Cells, and unchecking the Locked Box on the protection tab – as shown below:
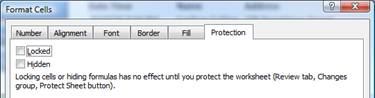
16. Protect Your Worksheet - Finally turn on worksheet protection by selecting “Protect Sheet” from the Review ribbon. Enter a password and repeat the password. This will prevent you or others from making accidental changes to the formulas and data contained in your template.
17. Keep in Mind – This case study covered the basics, but you could enhance this template a number of ways. Here are a few example hints:
a. Combine the three macro buttons into one button that performs all tasks – printing, posting, and deleting.
b. You might add an invoice number to the top of the page. Each time you post, your macro might also create a temporary formula in an empty cell that refers to the invoice number and adds one, then copies pastes that result atop the invoice number cell using the paste value command. Make sure the macro then deletes the formula in the temporary cell.
c. You could easily add more options to your order form.
d. Notice that we also included an option to decrease our price if a smaller paper size is selected.
e. The sales order form could be dressed up to look far more professional. Colors, grids, logos, etc. could all be added to make the sales order form match the accounting system, for example.
f. You could copy the worksheet and edit a second order for to be used in different situations. For example, Worksheet A might contain an order form that charges regular rates when a regular customer enters the store, and Worksheet B could charge higher rates when a lawyer enters the store – and so on.
g. The resulting database will continue to compile each sales order as posted, adding new orders to the bottom of the database area each time you post.
h. The bookkeeper need only record the date, customer name, address, and total amount due in QuickBooks. The printed Sales Order copies on file will serve as supporting documentation.
i. You can download a copy of this example template from www.CarltonCollins.com – click the Excel Link.